Tuesday 20 November 2012

The Highlights

I love my MAC Strobe Cream.  It can be applied under foundation or even just on it's own to bare skin for a pretty, fresh-faced sheen.  It's also great for highlighting cheek bones, brow bones, nose and cupid's bow.  It's even full of antioxidants and very moisturising so great for your skin too!  

I'm also a big fan of Benefit's Sun Beam, a gorgeous, gold highlighting cream and am somewhat obsessed with Illamasqua's Gleam in Aurora which is a beautiful, warm, champagne coloured highlighter.  But, having already shelled out over £40 on my Strobe and Sun Beam (Mac Strobe is £22.50 and Benefit Sun Beam is  £18.50) I don't think I can justify purchasing another highlighter just yet.  So, I decided to mix my own...  

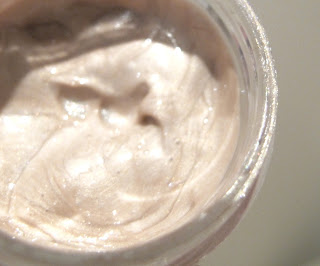
Though I love Strobe, the white cream with pink iridescent shimmer is quite cool so I thought I'd try mixing in a little of my gold highlight to add some warmth and make the overall effect a little more subtle and I'm really happy with the results:  the gorgeous, moisturising texture and goodness of Strobe with added warmth.  I still love Strobe and Sun Beam of course but now have a new one to play with too, yay!


Here you can see Strobe Cream across the top of my hand and ring finger and below it my new custom version.  


Sunday 18 November 2012

A couple more pictures of Perdy's natural make-up look...


I got the chance to make-over my little sis, Perdy today - such a pretty lady!  She doesn't tend to wear much make-up generally though she's partial to a bold lipstick on a night out.

We decided on a very natural look and I have to say she (below, holding my daughter Molly) looked STUNNING!!


After applying a matte primer and Illamasqua's Skin Base foundation, I enhanced her slightly hooded lids by brushing Mac's 'Brule' shadow all over the eye area up to the brows, followed by Mac's 'Malt' over her lids.  An extra sweep of 'Shroom' highlighting shadow (Mac) to the inner corners really opens up Perdy's eyes and makes them pop!
I finished off the eyes by enhancing her perfect almond shape with Mac's Teddy eye pencil along the top lashes and the lower outer third and Max Factor's 2000 Calorie mascara.


I contoured with Illamasqua's Cream Foundation (320 - a great contouring product), applied their cream blush to her cheeks and highlighted Perdy's cheekbones, bridge of the nose and brow bone with my custom blend highlighting cream and kept her lips natural with lip balm and a little of the cream blush for a hint of colour.  To finished off I added a sweep of Benefit Sugarbomb to Perdy's cheeks, picking out the apricot colour and set the base with Mac's Invisible Powder.

I pop of bright lippy would take this look from day to night in a jiffy!


Friday 16 November 2012

Blimey, how time flies when you're a professional make-up artist!

Yes that's right folks, I passed my course and am now an MUA - hell yeah!  Need to get loads of practice in before I head out into the world making up the great British public though so if you're in the Croydon area and fancy a free make-over look me up!

The entire course was such a journey for me.  I made some great friends and learnt SO much!  Not just about application but products, brands, loads of phenomenal artists and photographers and about the industry in general.


I had a fabulous time, though I had a couple of tearful wobbles along the way.  I struggled mostly with timing annoyingly, as we were always given time limits but this meant a lot of the time I didn't get to finish the make-up, hence why I want to practice-practice-practice before launching myself professionally.

Here are a few more of my favourite pics from the course and a couple since.  If you have any questions about the products used, feel free to get in touch. 

Pigment day!  On this day Aga did a great tutorial in the AM, showing us a natural look on one side of Festina's gorgeous face and an explosion of colourful pigments on the other.  

She looked so awesome, and got a few stares on her lunch break too!  We then had a go with the pigments ourselves in the afternoon and at the bottom you'll see my look on Maria-Carmen.  I ran out of time (as usual) but I think she looked great.


How cool are the below images?!  Nicci wanted to show us two different glowing skin applications.  If you click into the images you'll see how gorgeous Maira (top pic) & Hannah's (bottom pic) skin looks.


Below are a few more of my favourite looks that I created on the  course though I never managed to get round to finishing Hannah's (top and bottom) looks.  Both obviously need some blush and mascara but I think the colours look really pretty on her.


Some practice on my sisters before our photoshoot day.  Clio (on the left) was made up with a fresh, dewy application for my beauty look and Perdy (on the right) got the fashion look.  Finally i managed to get the looks done in the 45mins, hurrah!


And here are a couple looks I've done since the course.  Mostly i've been concentrating on perfecting my eyeliner technique (please excuse my dark circles, I didn't bother with a base but probably should have!).  There is also a pretty, green smokey eye look and Manuela was my model for the orange lips which i think look perfect on her warm, Italian skin.